Self Driving RC Car
Motivation
I saw a talk where the speaker spoke about how modern computer vision systems should take more inspiration from biology. He described the mantis shrimp, a sea animal with two eyes that move independently of each other, and wondered whether its eyes enable better representations of the visual world. He was asking why evolution chose this design for the shrimp? And how did the design help?
Transforming these questions into scientific inquiry would be challenging to say the least. Nevertheless, they inspired me to try to build a small-scale autonomous vehicle with mantis shrimp like eyes. I'm not there yet: my RC Car has only one eye i.e. one camera. But it can drive itself, albeit only on a particular track. I'll use this post to describe my car. Before I begin, I would like to give huge credit to the Donkeycar project. I was able to build my car only due to them.
Design
I haven't found discussions on motor selection, battery selection, power consumption and weight of RC cars on the Internet. My struggles in understanding these culminated in a lot of bad designs. I think it'll be useful to describe and justify my design here.
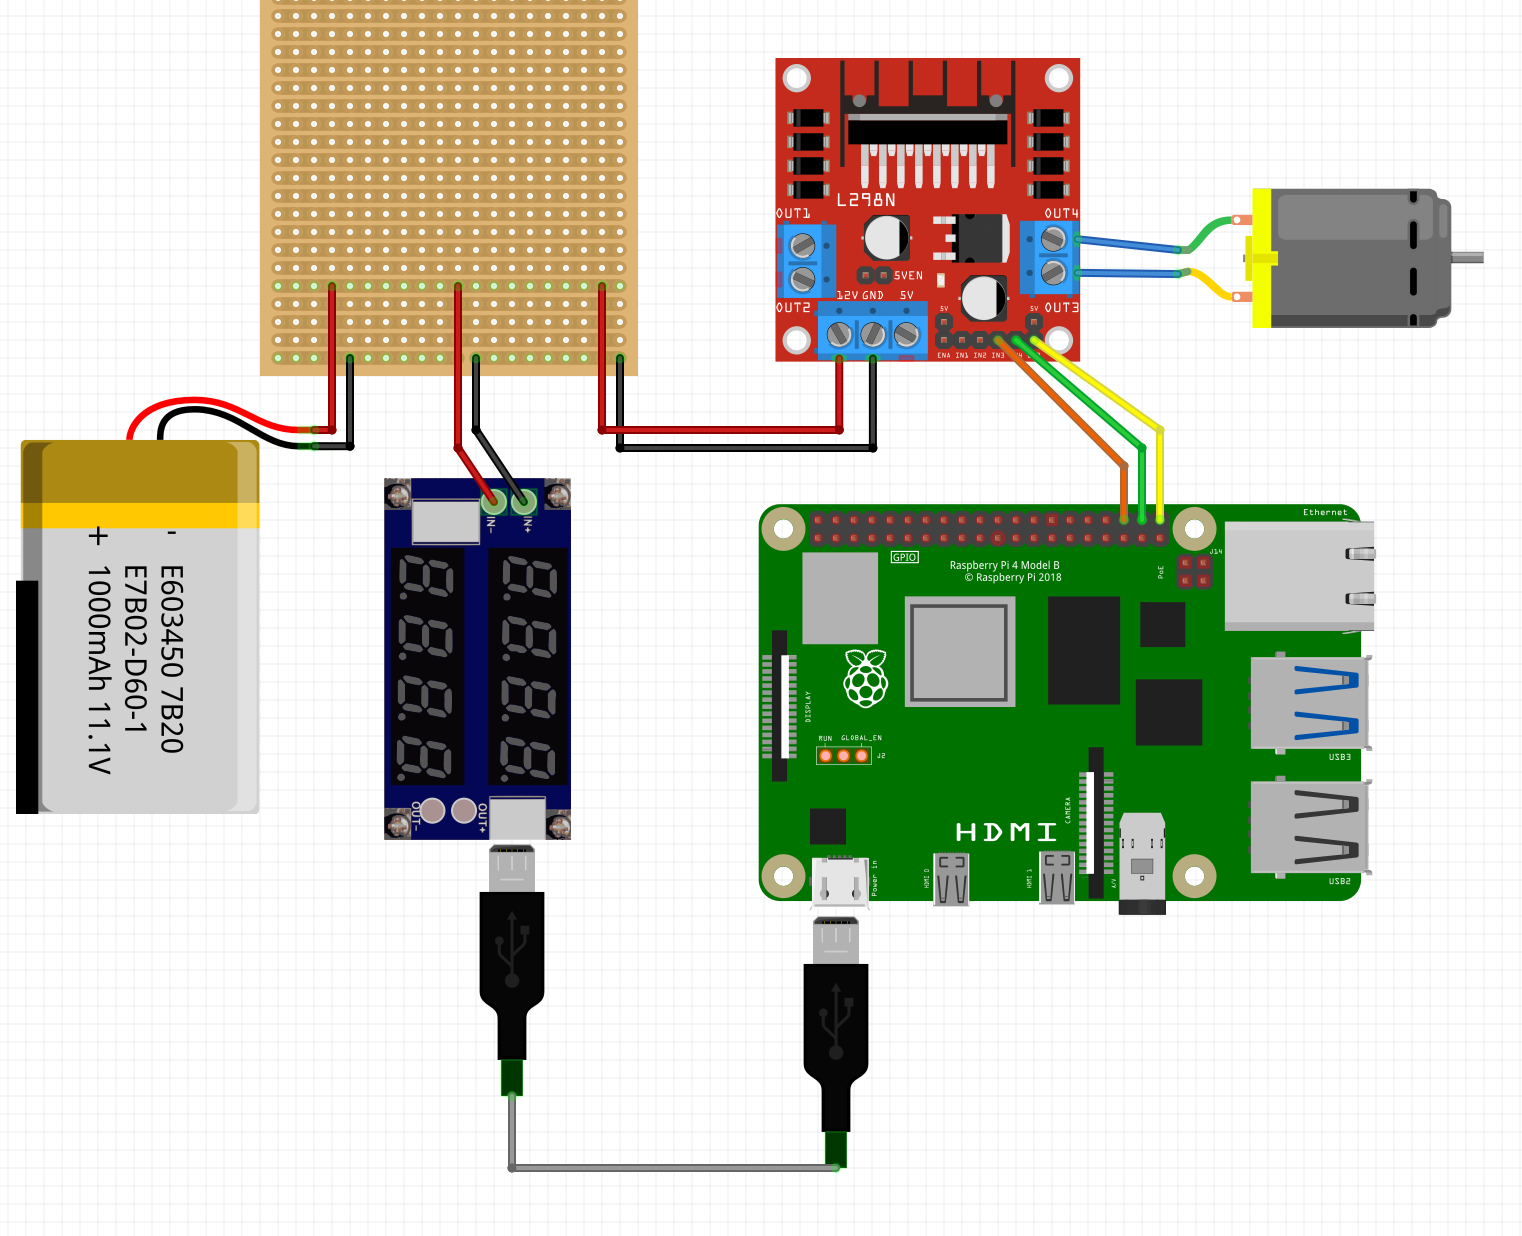
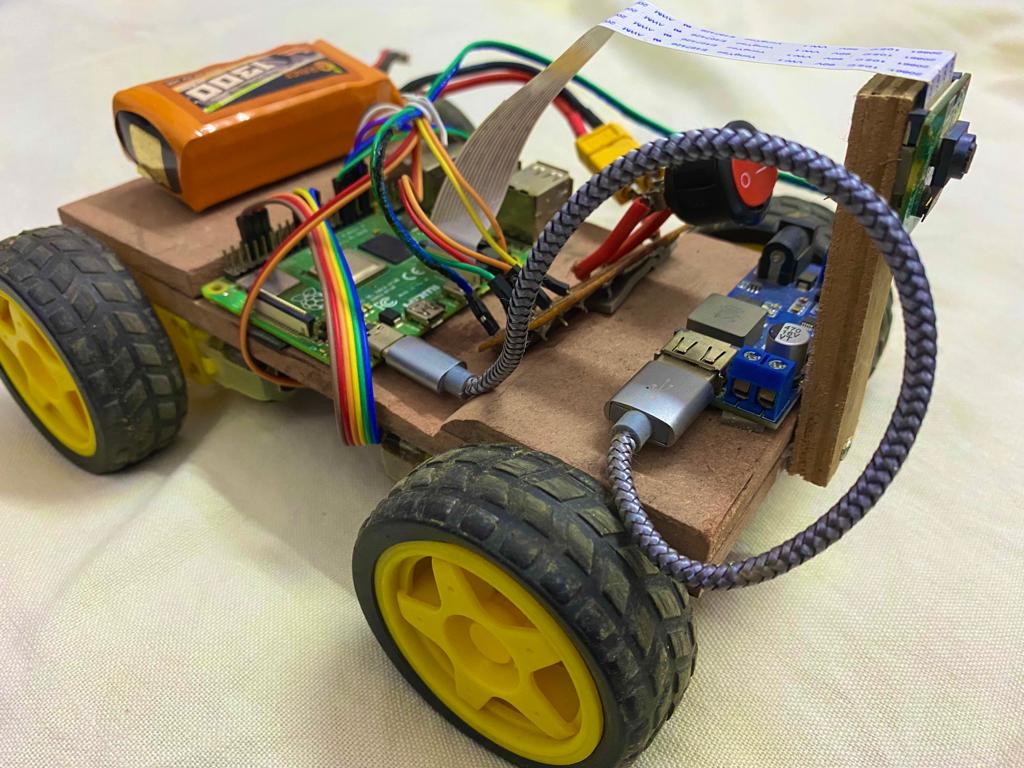
The schematic (original source) shows how to control a DC motor using a Raspberry Pi. A lithium-polymer battery powers both the Raspberry Pi (4B) and the L298N motor controller. The Raspberry Pi requires an operating voltage of 5V at 2A current, which it gets from the XY-3606 DC-to-DC converter (the blue board in the schematic). It is important to connect the XY-3606 to the Pi using a USB cable. I tried to connect the two, directly using jumper wires. It didn't work: the Pi failed to boot.
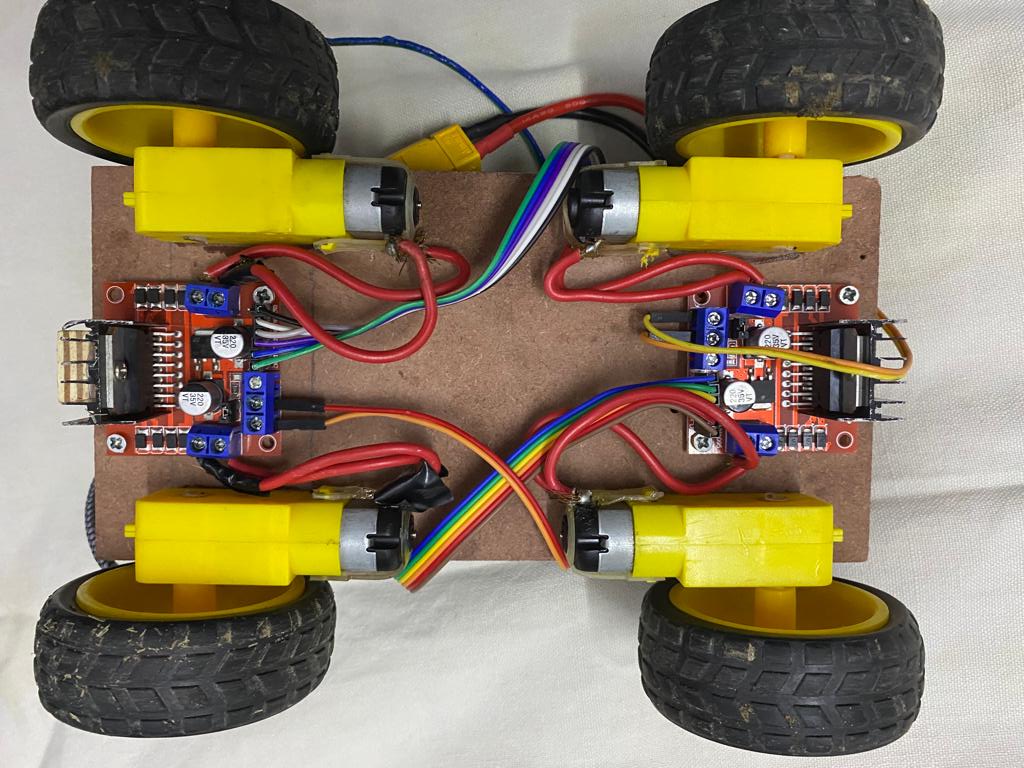
The Pi controls motor speed and direction by sending 3 signals to the L298N motor controller. Two of them (orange and green wires in the schematic) control start, break and the direction (forward or reverse). The third (yellow wire) is a PWM signal which controls the voltage supplied to the motor, and hence the car's speed. A single L298N motor controller controls 2 motors. My car has 4 motors and thus requires 2 such motor controllers. These are stitched on the underside of my car in order to save space.
The total cost of all the components on the car is around 11,000 rupees. It is quite a lot but note that the Raspberry Pi, its camera module and the Lithium-Polymer batter account for nearly 75% of the total cost. These can be used for a lot of other things as well.
Now that I have described my design, I'll try to justify it. My justifications are based on extremely crude models that don't represent the actual physics of the system. Still, they are useful in illustrating which variables are important and which are not.
Battery
Selecting the battery is obviously crucial. They are quite expensive. Before purchasing them, you have to be sure that they will be able to power the components in your circuit and will be able to run them for sufficient amount of time.
I collected the power requirements of components in my car. Some I obtained from their respective datasheets. Others I estimated from their operating currents and voltages. I don't have the sources for these anymore. Treat them as ball-park estimates.
| Component | Power Consumption (W) |
|---|---|
| Raspberry Pi 4B | 10 |
| 2 L298N motor controllers | 50 |
| 4 BO motors | 10 |
| XY-3606 | 5 |
| Total | 75 |
My Lithium-Polymer battery supplies a voltage of 11.1V. Since $\text{Power} = \text{Voltage} \times \text{Current}$, the discharge rate is $\frac{\text{Power}}{\text{Voltage}} = \frac{70}{11.1} \approx 6.3A$. This is well within the rated discharge rate for my battery.
I can also estimate the battery life by reading the battery capacity. The battery contains $1000mAh$ of charge. In SI units, this is $1000 \times 10^{-3} \times 3600 = 3600C$. Now assuming that I can discharge the battery completely, I get $\frac{3600}{6.3} \approx 10 \text{ minutes}$ of battery life.
This analysis should raise a lot of eyebrows. For one, Lithium-Polymer batteries should never be discharged completely. Doing so would render them unsafe for future use. Moreover, batteries don't supply constant power as they discharge. Power supply diminishes through battery operation. This means that my calculation of the discharge rate and battery life is not really accurate. Nevertheless, these back-of-the-envelope calculations helped me be sure that my car could run and would do so, at least for a few minutes.
Force
In order for the car to move, it has to overcome friction. Frictional force is often modelled as $F_{\text{friction}} = \mu \times M \times g$. The mass of my car $M$ is around 0.5Kg, the coefficient of friction $\mu$ is usually less than 1 and $g$ is acceleration due to gravity, $10 m/s^2$. If the motors can provide a force greater than $1 \times 0.5 \times 10 = 5N$, the car should move.
Motors convert electrical power to mechanical power. The cheap DC motors that I use, do so with around 50% efficiency. This means that we get $0.5 \times 10W = 5W$ of mechanical power to work with.
Mechanical power is $F_{\text{motors}} \times v_{\text{car}}$. Since the motor turns at 150 rpm or about 15 rad/s, the velocity of the car is $v_{\text{car}} = \text{wheel radius} \times \omega = 2 cm \times 15 rad/s = 0.3 m/s$. Hence $F_{\text{motor}} = \frac{5W}{0.3m/s} \approx 17N$. This is more than $F_{\text{friction}}$ with some margin. The car should move. In practice, it does!
Even with these crude arguments, few things become apparent. For example, your car shouldn't be too heavy. Perhaps this was already obvious. But some other things were not, at least to me. For example, wheel radius is an important variable. It trades of the car's velocity for motor's force. If your car doesn't move, try reducing the wheel radius. I learnt this the hard way when I bought monster wheels only to later have to bin them when the car didn't move.
Software
I installed the Donkeycar github repository. It has a lot of useful features that make experiments easier. You can launch a web server on the Pi and control your car through a web browser. There is a convenient way to define parts in your car and interface between them. They even save data for you as you drive. You can use this later as training data for your neural networks.
Donkeycar also advices you to install Tensorflow or Pytorch on your Pi. It wasn't easy to install these. The pre-built python wheels didn't work for me. In the end, I abandoned them, instead installing the lightweight ONNX runtime for neural network inference.
Donkeycar has also provides predefined templates for 2 wheel differential drive using the L298N motor controllers. These specify which pins on the Pi control what. Differential dirve lets you can steer the car by controlling the speeds of 2 motors. For example, to turn left, you would turn the left side wheel slowler than the right wheel. Since my car has 4 wheels, I had to define my own template. You can find it in this pull request for your reference.
Driving it around
I enjoy driving the car around. Part of my motivation in building it was to show it off to other people. Such projects were quite common in my college, but they are rarer back at home. I kind of miss that environment now that I have graduated. It would be nice to have a community such as Donkeycar's where people got together to learn about this kind of stuff. People, regardless of age, will always find something like this very interesting. It can be an easy gateway to learning deeply about today's technological buzzwords such as IoT and Machine Learning.
Sometimes when I'm driving the car around, people ask me how I built it? how much did it cost? how does it work? how does it move on its own? To the last question, initially, I gave some vague reply, "Oh, it'll be tough to explain". That person pushed me, "You think I won't understand?". So I explained that I had recorded myself driving and he immediately got it, "Oh so it is copying your behaviour". This is quite accurate. Maybe I can explain it to people at different levels of detail. It is not always necessary to describe what neural networks are and what backpropagation is.
I get fascinated by how children interact with the car. They'll run in front of it or chase it. One toddler even tried to poke it, as if it were a dog. Sometimes, I let them drive it. It is a good way to stress-test the car. Since it is hard for them to control the car, they'll often drive it off the track or into a wall or turn it upside-down. It makes them laugh and so far my car is intact.